Author: Pratik Londhe

  • Day 6, WordPress and more…

    • CI/CD setup for project
    • Fixing the key not found error
    • Learning wordpress

    CI/CD setup for project


    When we are developing a web application, we want it to be able to share it with other people also, otherwise it’s just code sitting in out computers. In rtcamp we are given access to a remote server so we can upload our applications there and make them available to the world.

    How to transfer the project files from your local machine though ?

    rsync : It is a command line utility using which we can upload files from our local machine to remote or download them into our local machine from remote

    Syntax for rsync basic transfer operation is :

    `rsync [source]  [destination]`
    
    example `rsync /user/victor/sites/getit 34.56.43.33:/opt/easyengine/sites/getit`
    

    This uses SSH to remote server and we can sync the files from source to destination. Read more here.

    This is not really efficient as every time we make changes in our site we have to rsync it, how about we automate this process ?

    This is where github actions and workflow comes in play, github actions allow us to run workflows like running tests, inspecting code and also deploy the code on server or anything we want to do once a specific action is performed on github.

    Github actions can be events like push to branch, pull requests etc.

    • To write a workflow, create a folder inside your repo named .github, inside it add new folder workflow
    • create a new file inside .github, named hosts.yml
    deployment:
      user : username
      hostname : remote server address
      deploy_path : path/to/your/server/folder


    Then create a new file inside workflows folder name it anything like deploy_on_push.yml

    on:
      push:
        branches:
          - deployment
    
    name: Deploy and Slack notification
    
    jobs:
      deploy:
        name: Deploy
        runs-on : self-hosted
        steps:
        - uses: actions/checkout@v2
        - name: Deploy
          uses: rtCamp/action-deploy-wordpress@master
          env:
            SSH_PRIVATE_KEY: ${{secrets.SSH_PRIVATE_KEY}}
            WP_VERISON: 5.8
        - name: cleanup
          if: ${{ always() }}
          uses: rtCamp/action-cleanup@master


    • You can learn about github actions from here

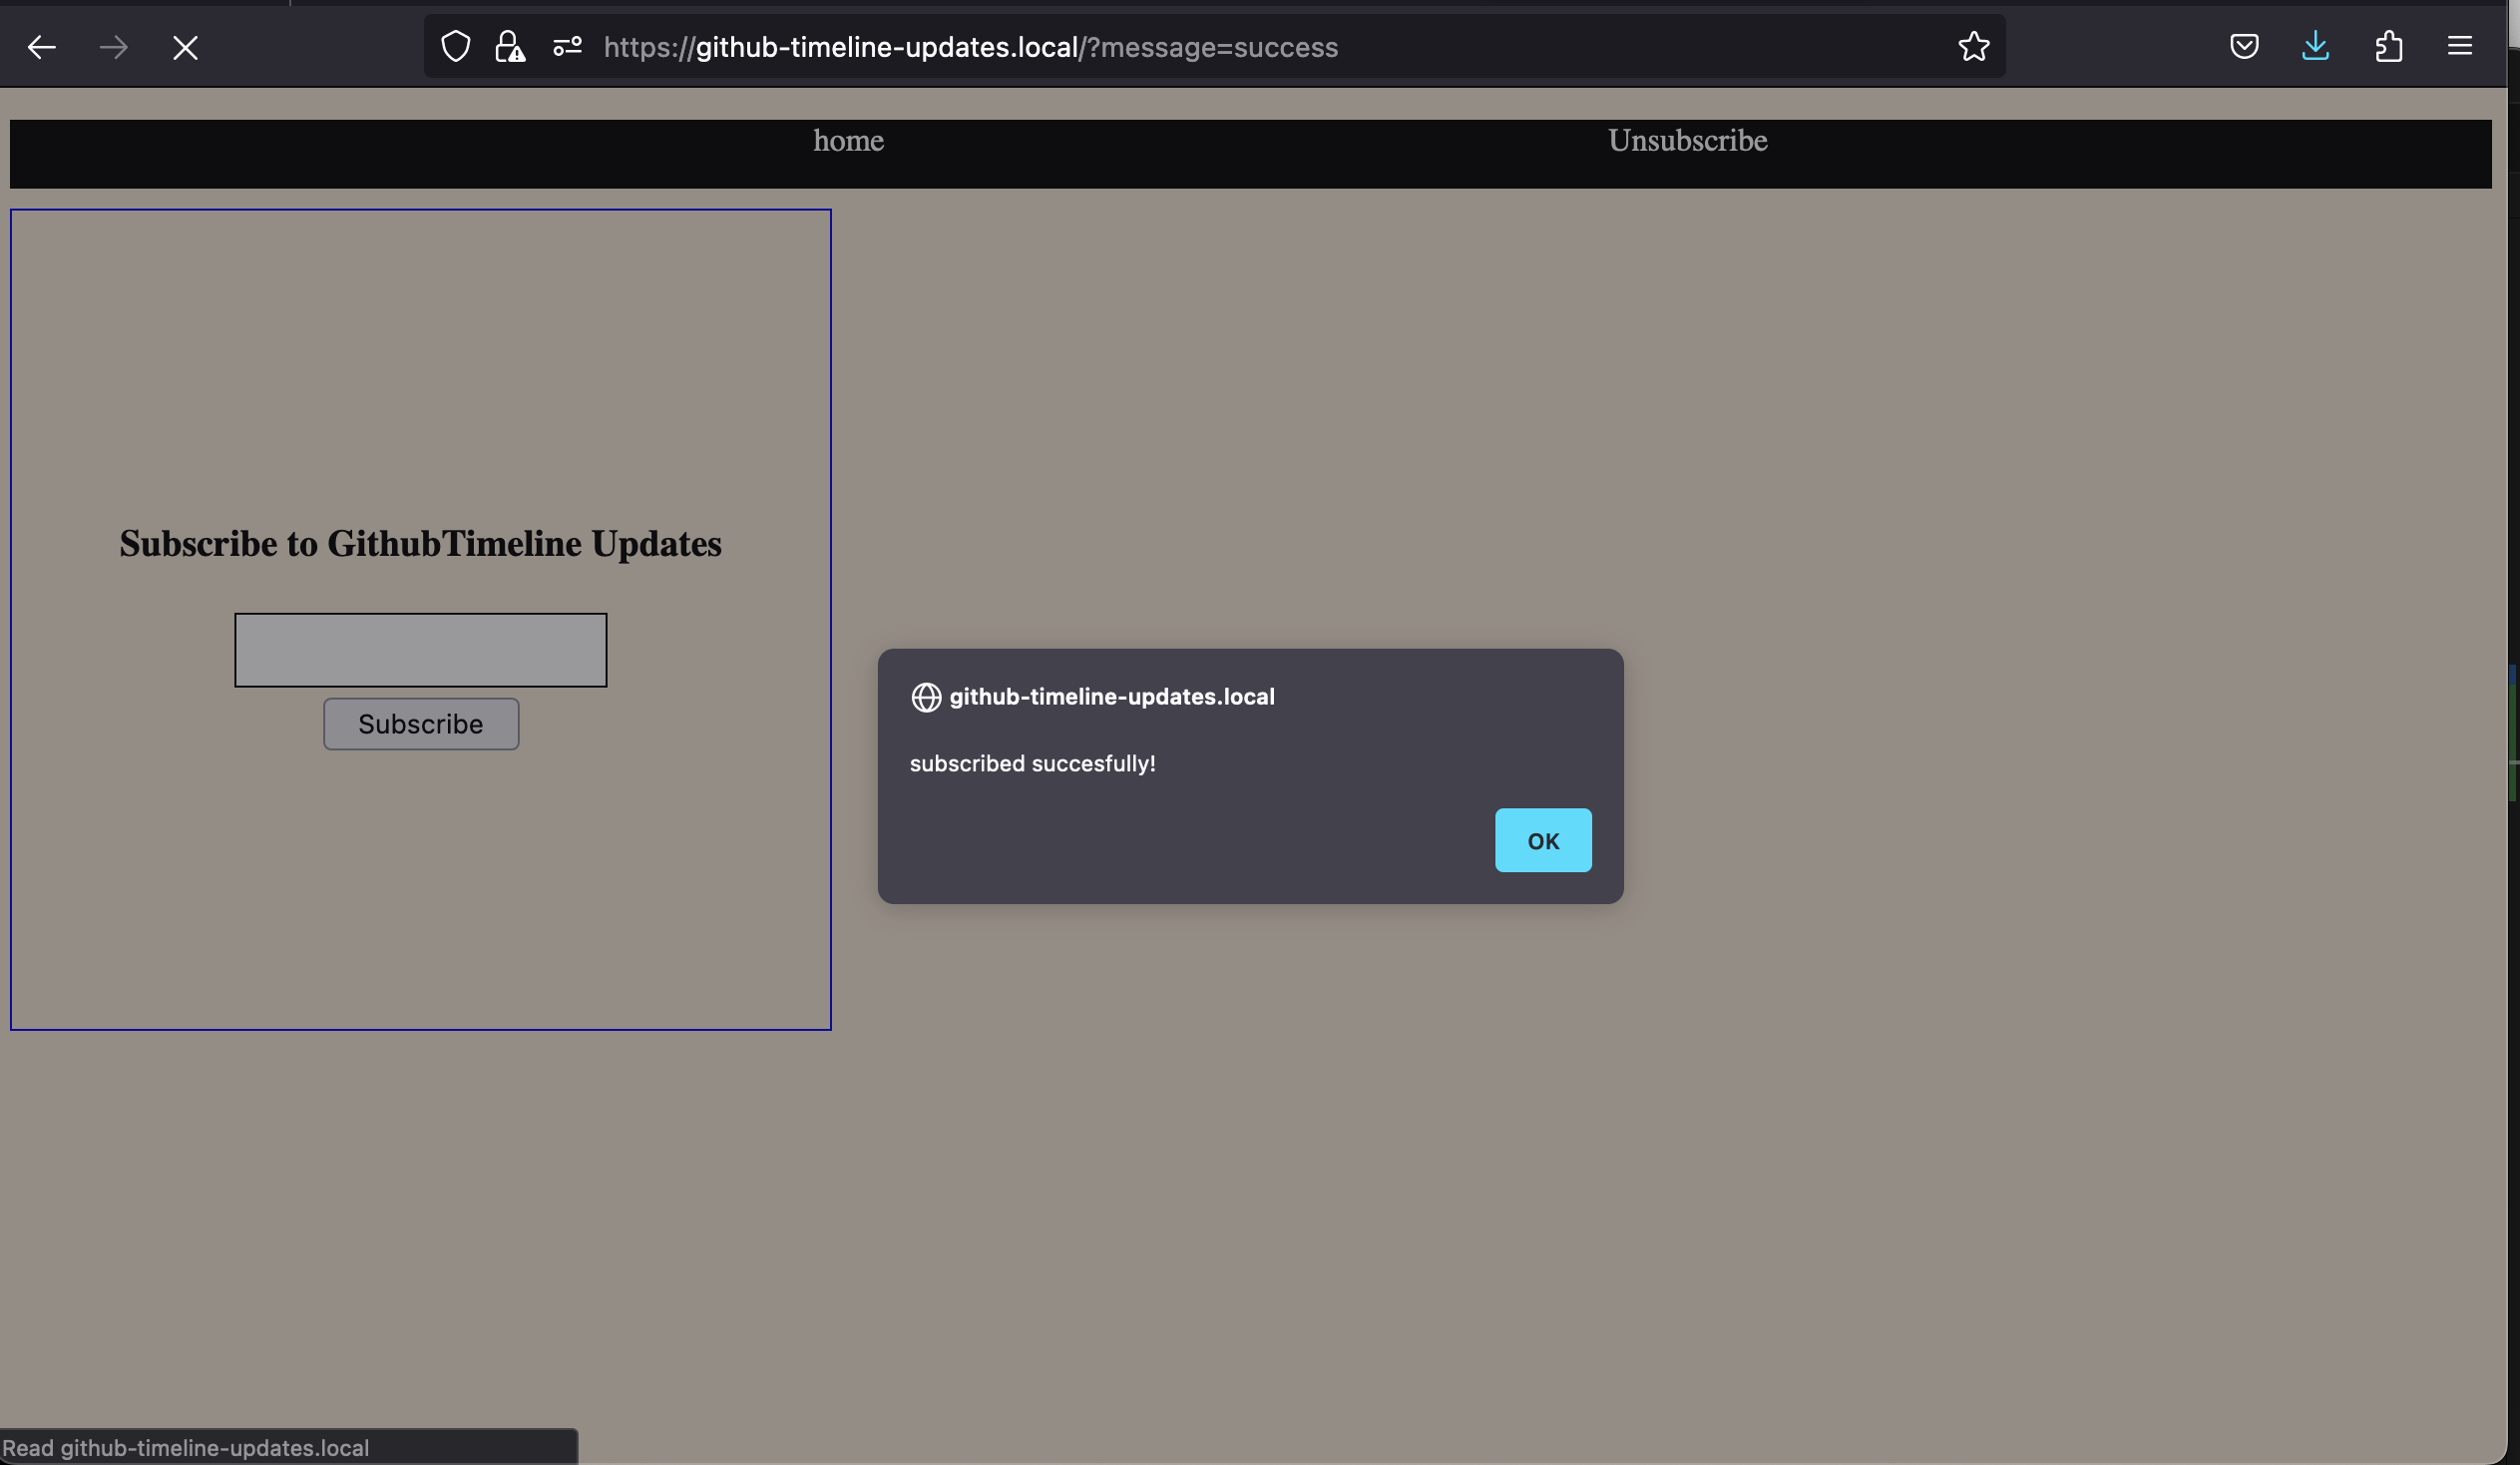
    Now, everytime you push changes to the deploymemt branch on github, it will automatically deploy it on the server, no need of manual intervention.


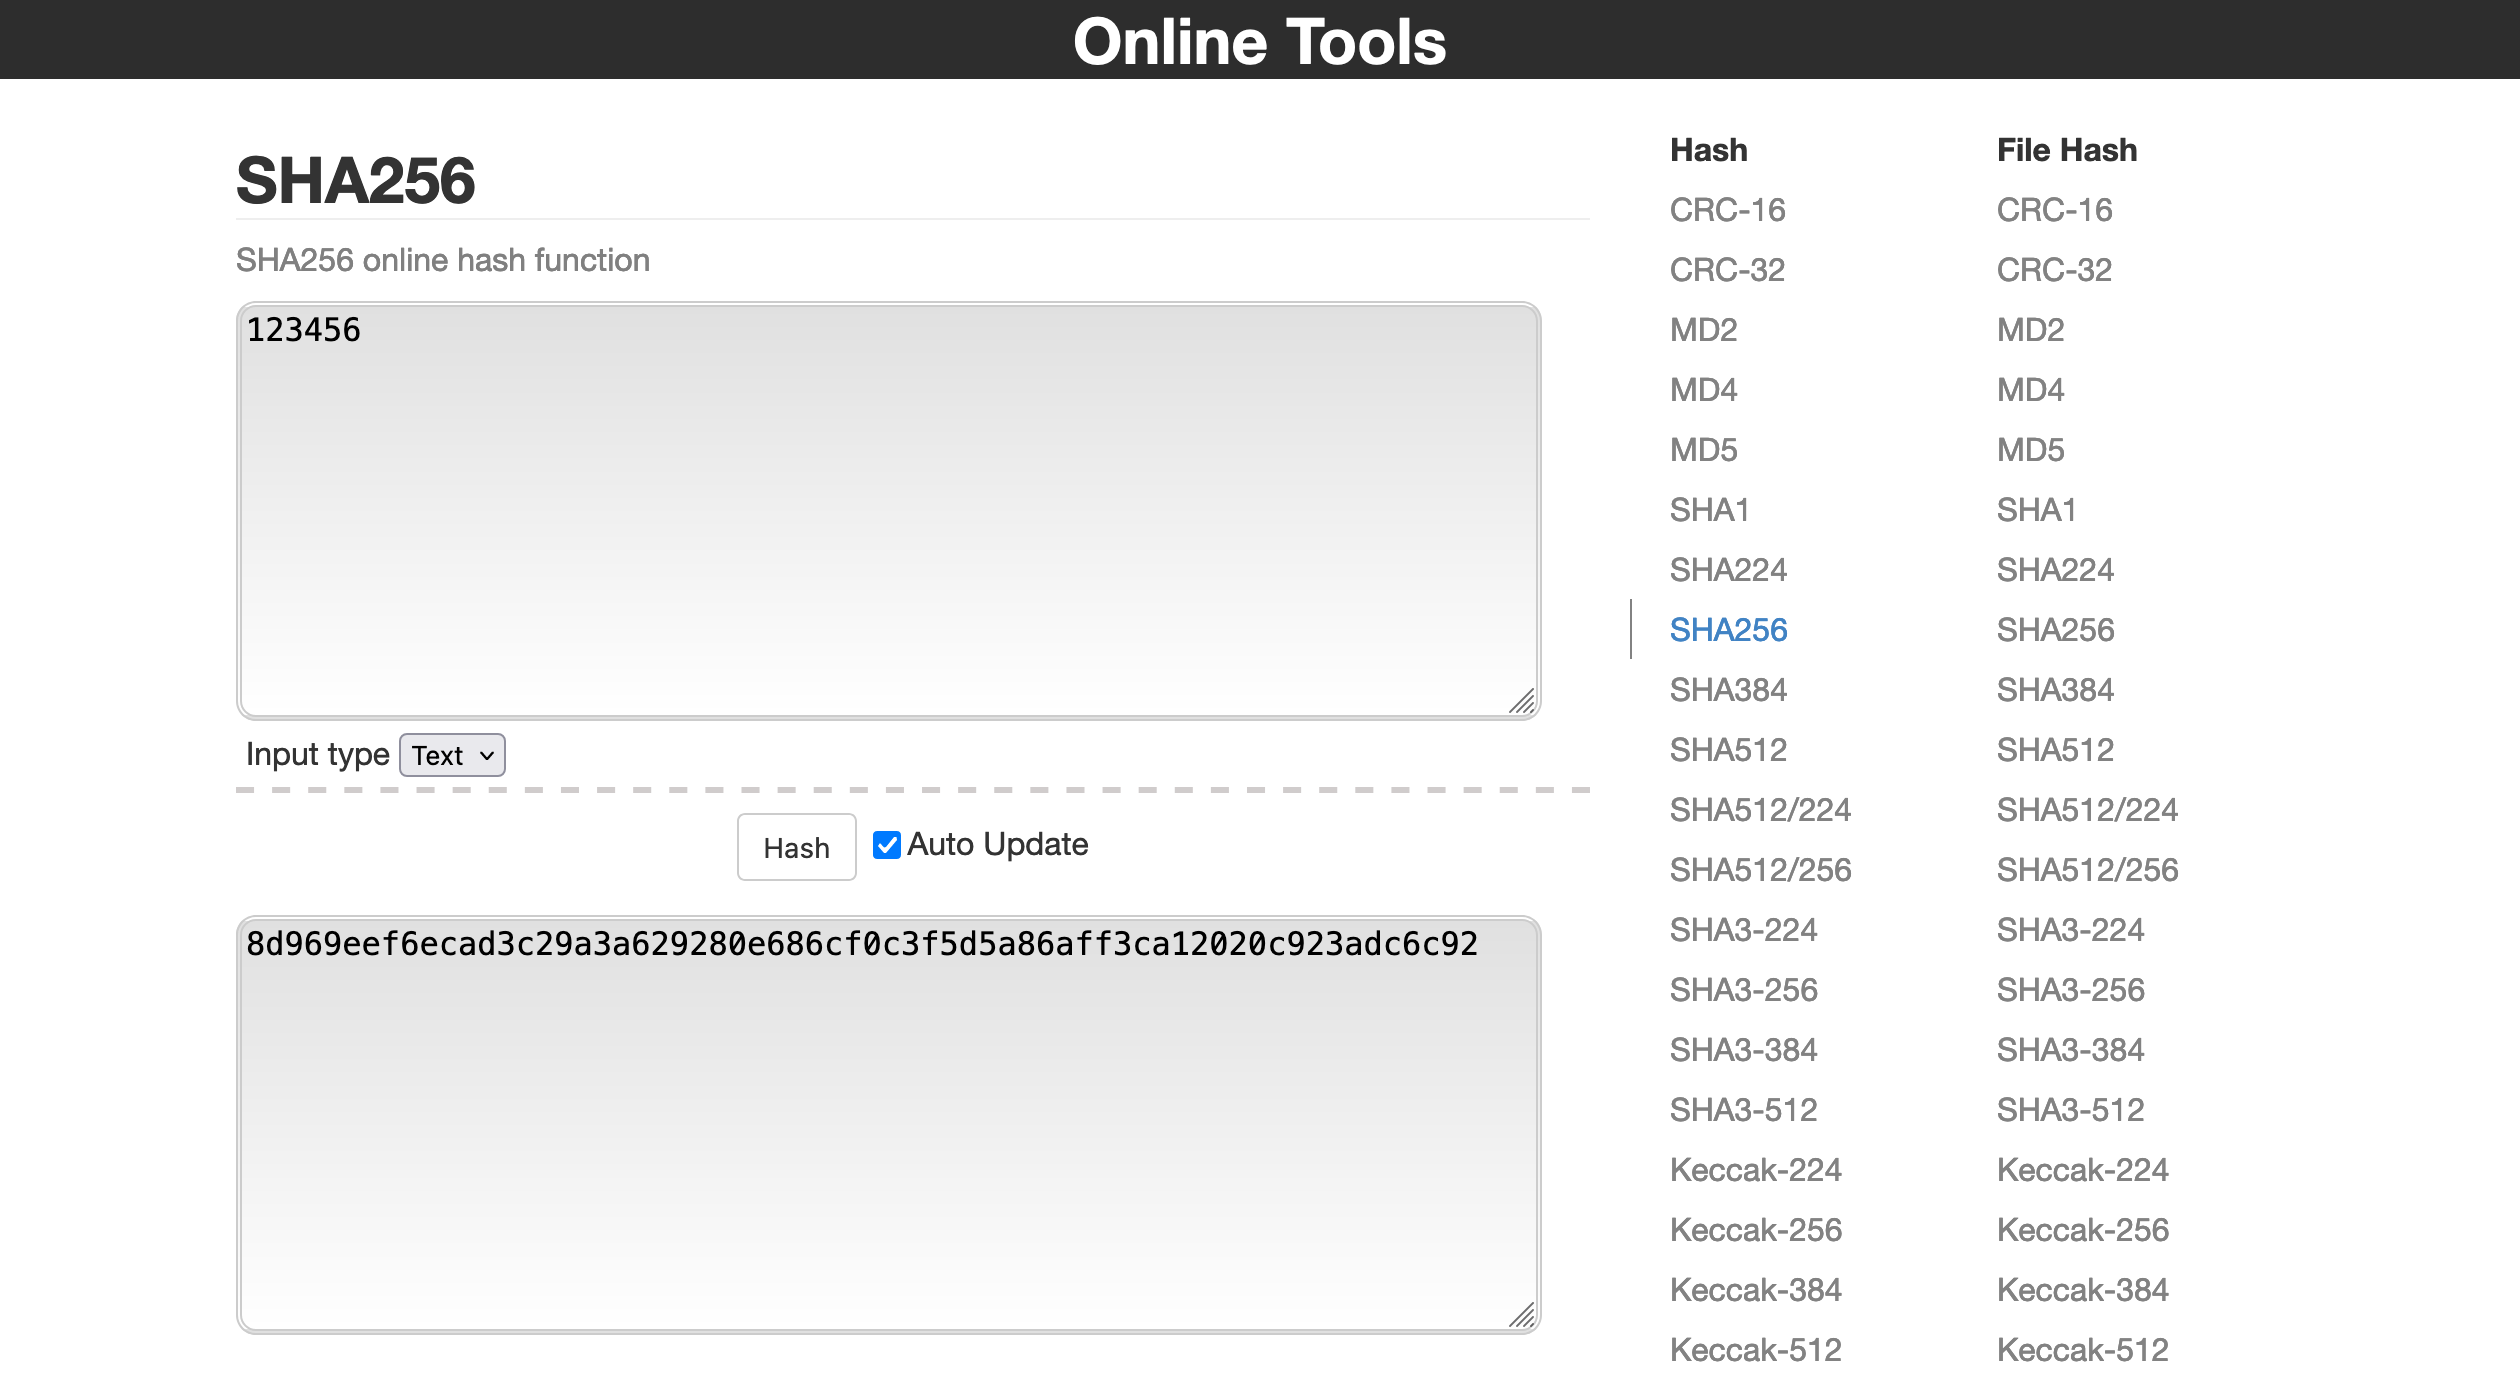
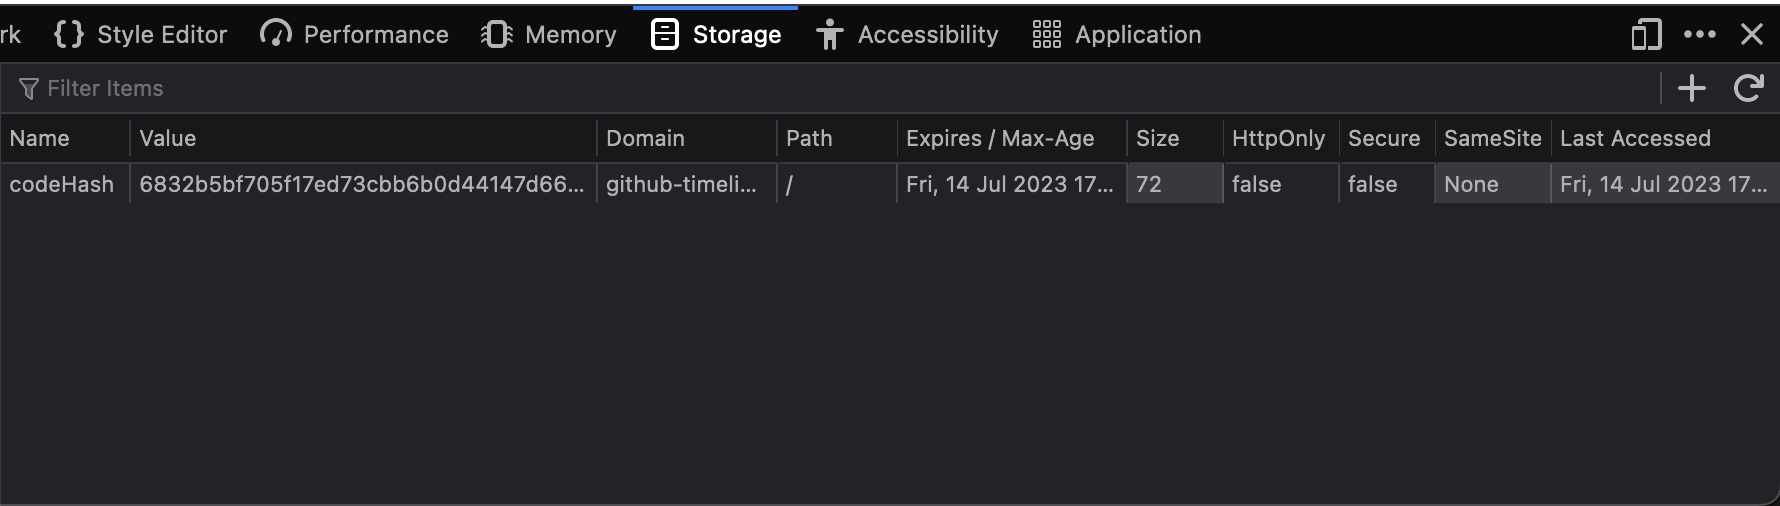
    Fixing key not found error:


    When using github actions to deploy our code on the server we are using SSH to connect to the server.

    To connect to server via SSH we need SSH key, when I first just followed the tutorial form the course to do this but the error in the github actions was failing the workfloe run.

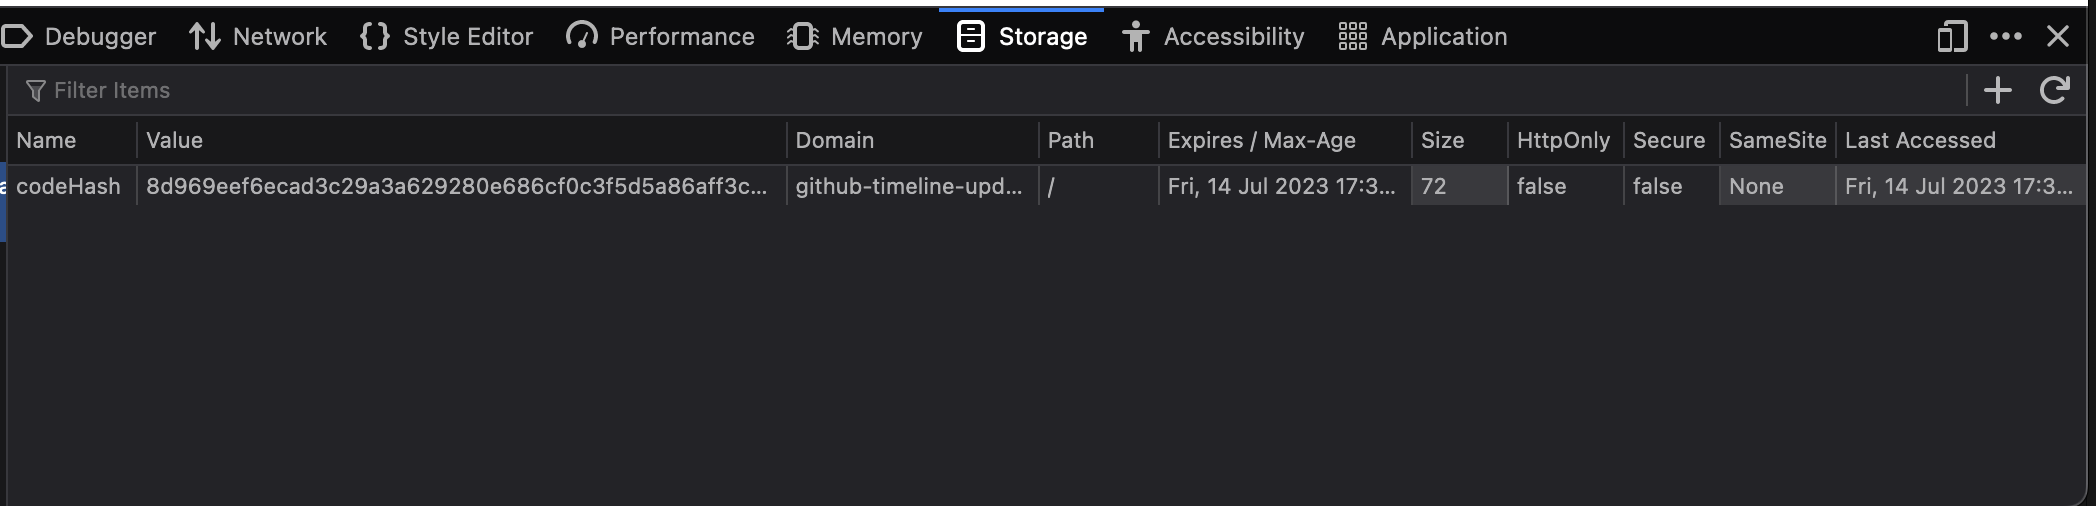
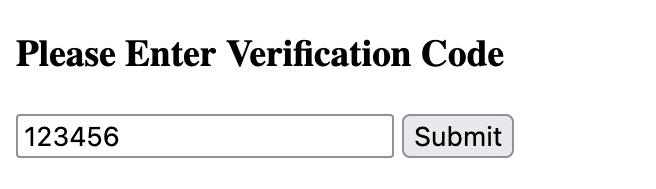
    For this, I read this documentation again and again and found a way to add secrets to a repository from CLI using github CLI.

    1. First install the github cli using homebrew : brew install gh
    2. Then go to you project repo and type this command : gh secret set SSH_PRIVATE_KEY > ~/.ssh/id_ed25519
    3. press enter, now the key error should be fixed.

    Learning WordPress


    To be able to work on wordpress development, we have to first get experience how a user might use it, for that we have dedicated one week just to learn about using wordpress.

    We can start by locally installing wordpress using local wp and creating a new site on it.

    WordPress has very in depth documentation for users on how to use it to manage sites, themes, customization, administration and also how to install plugins.

    How to create a wordpress site using local wp?

    Click on the green + button at the left bottom corner of local wp window

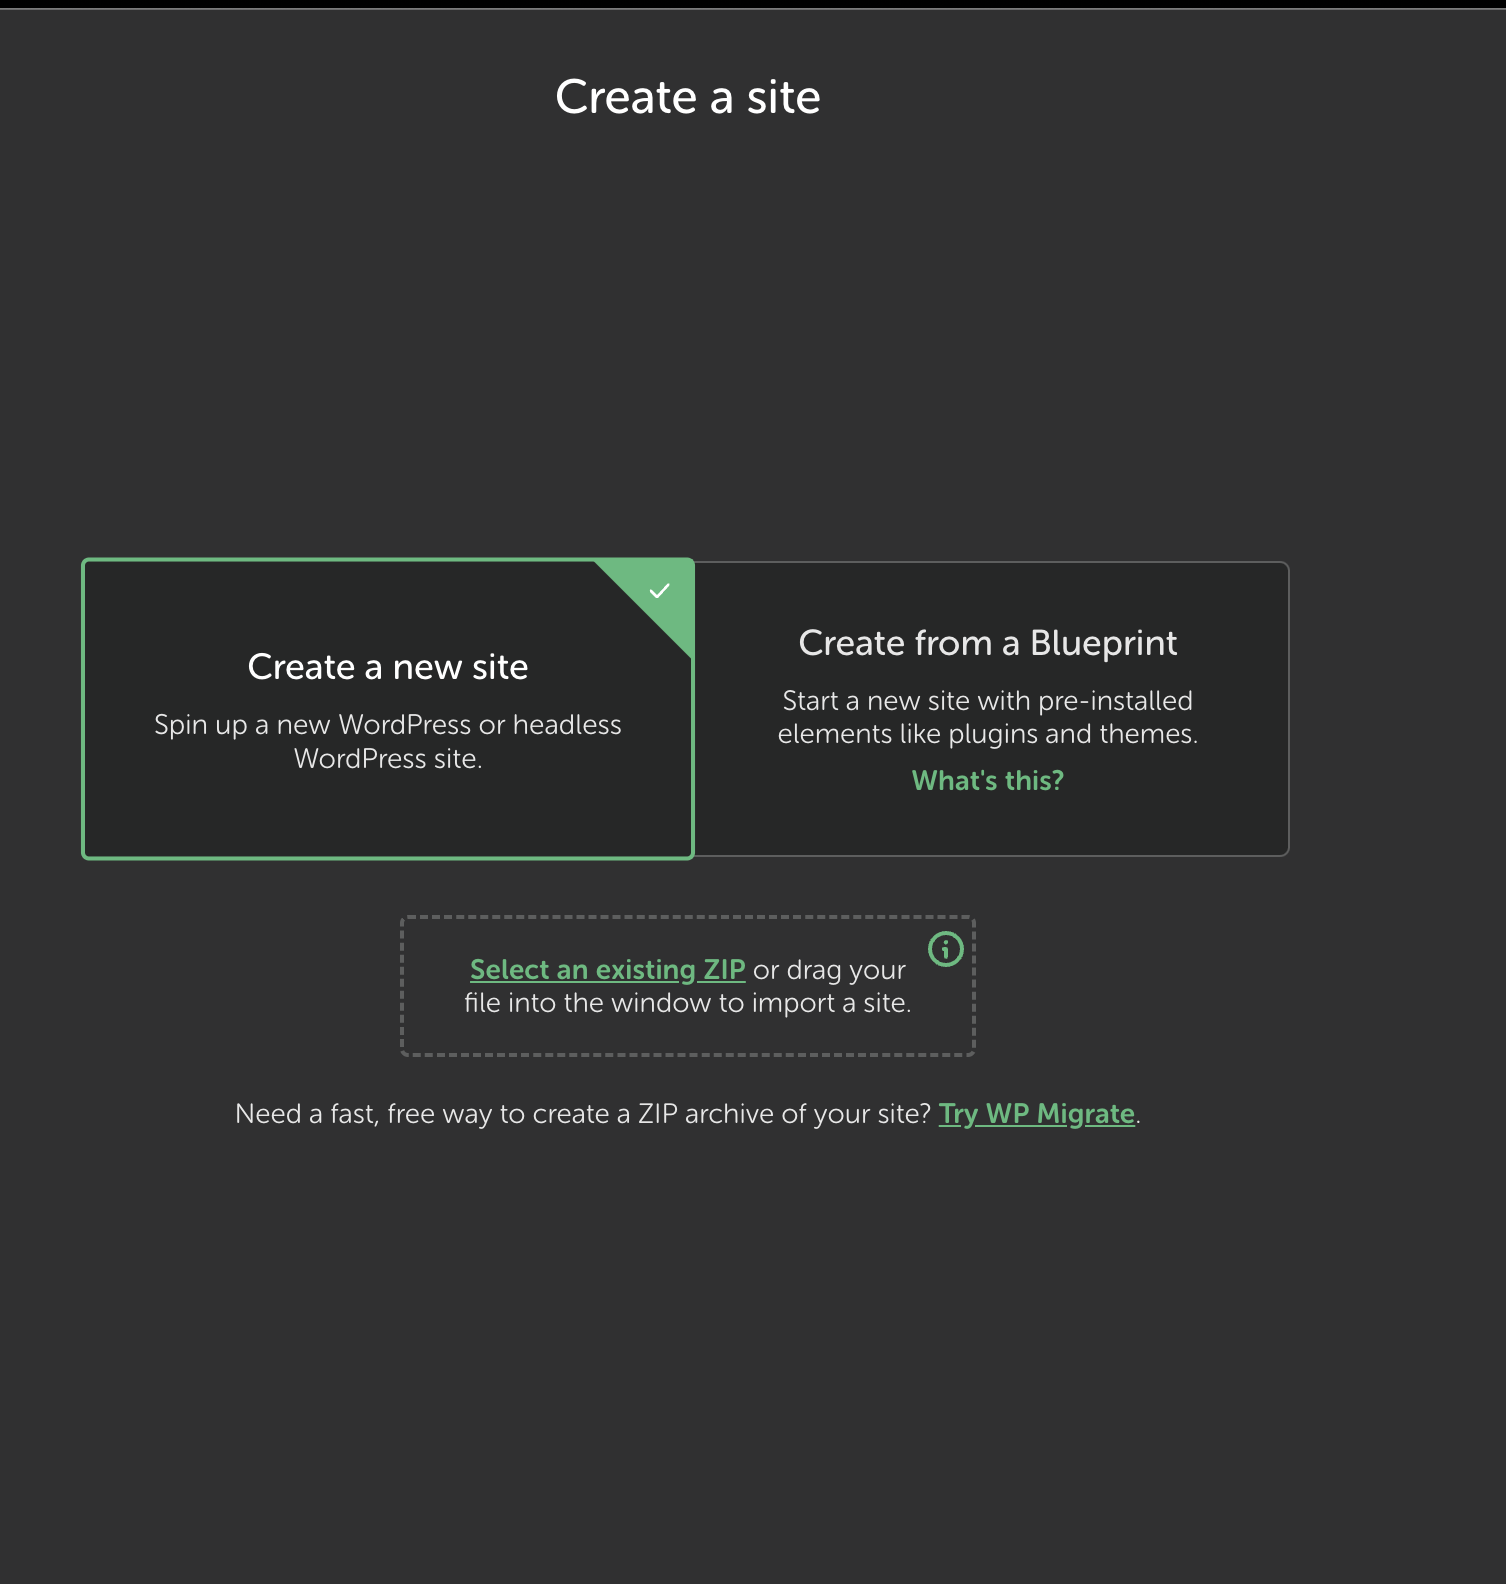
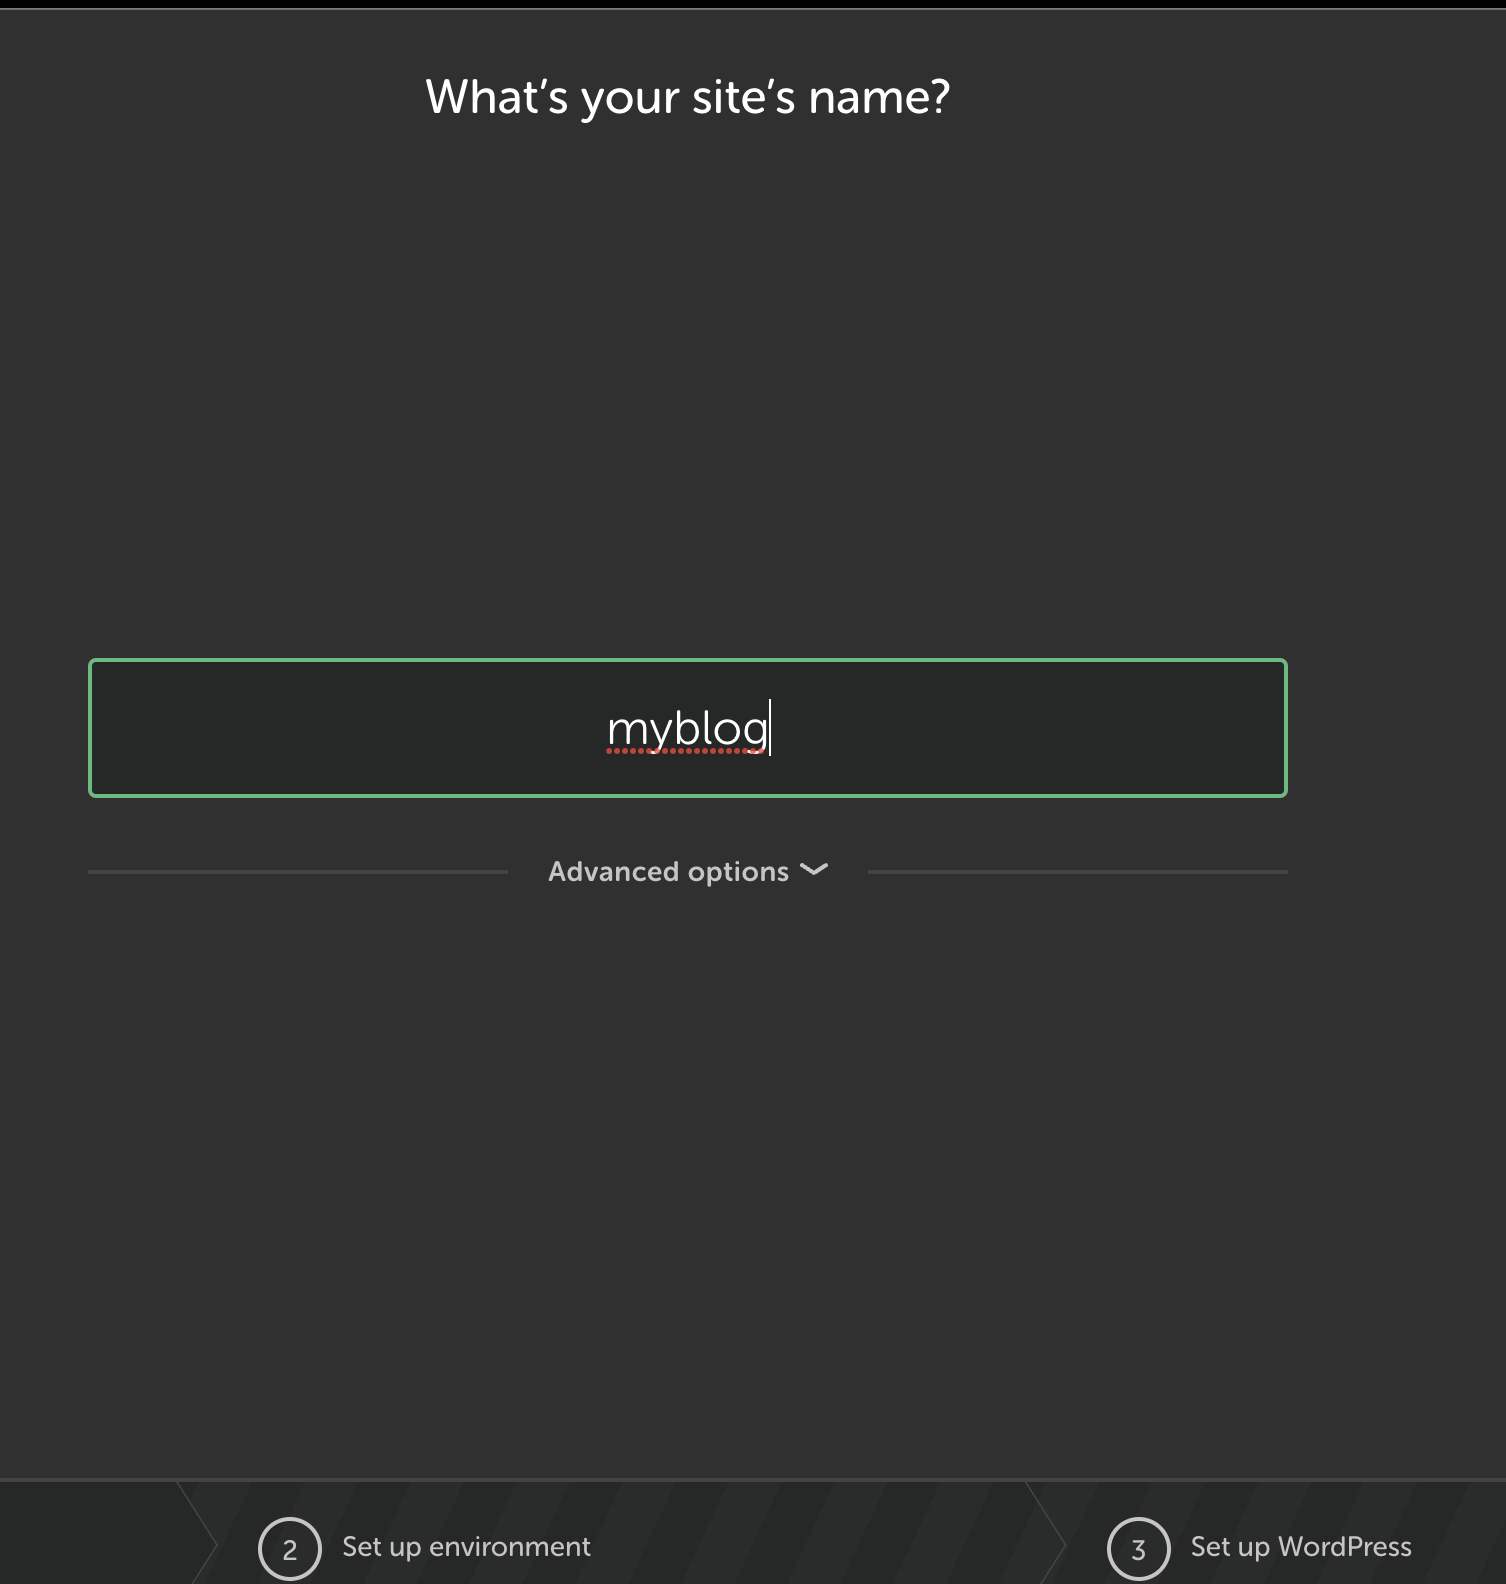
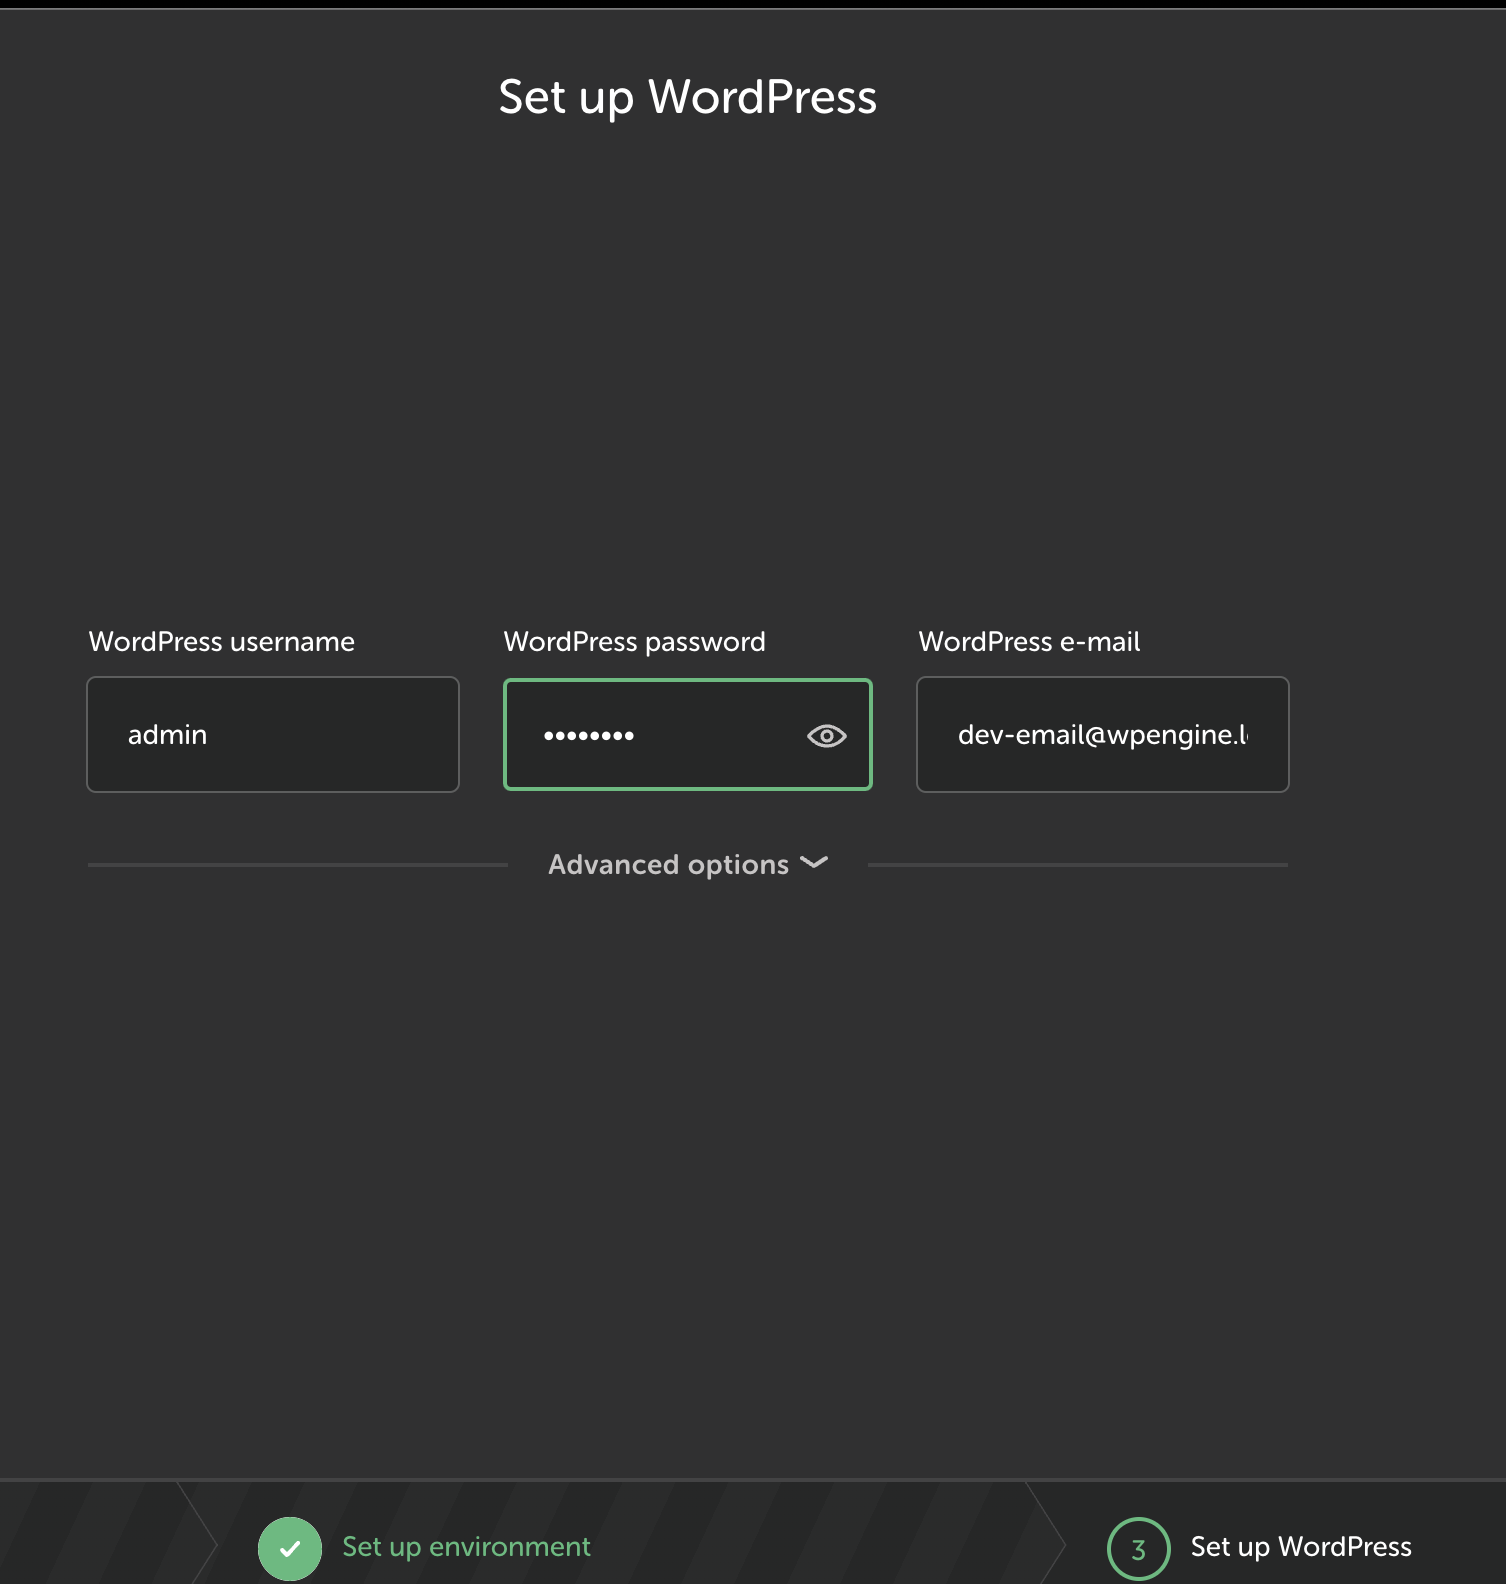
    After this, a new site will be created for you with wordpress installed on it.

    The admin Dashboard


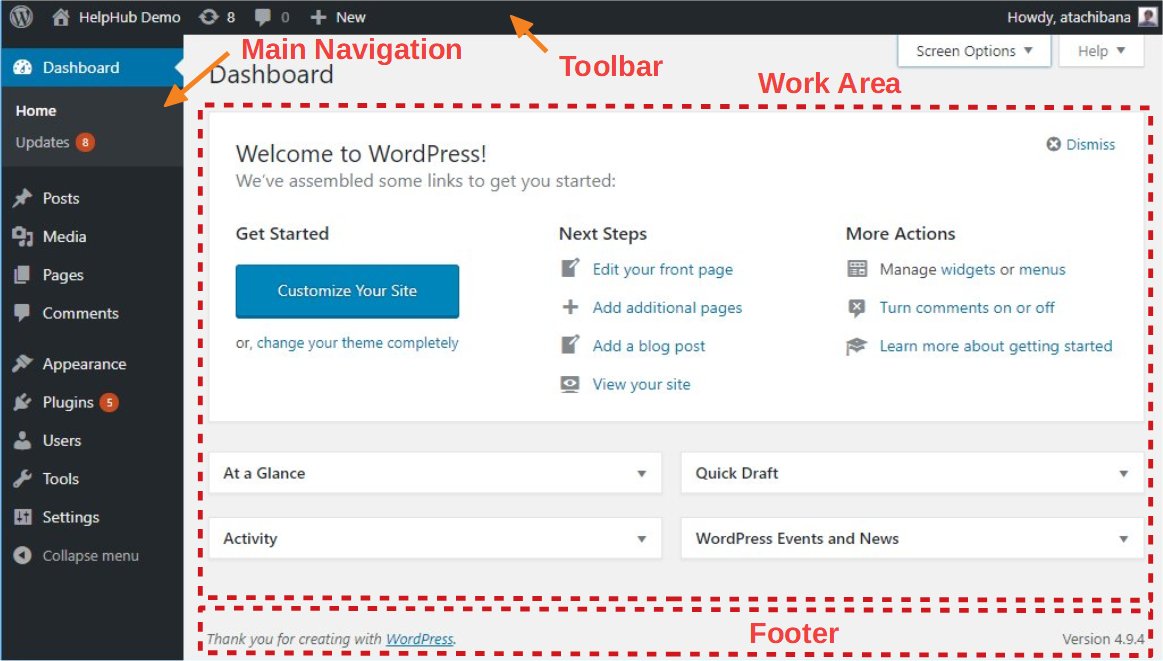
    The main dashaboard has following widgets :

    1. Welcome :
      • Displays link to learn about the version of wordpress.
      • links to common task like creating new page or customizing the theme.
    2. Site Health Status :
      • Shows how the site is doing, if the performance and security is good, also suggests what to do to improve it.
    3. Activity :
      • Shows recent activities in your site like recent posts and comments
    4. Quick Draft :
      • We can use it to write a draft quickly to be published or to use later
      • it also shows other drafts we have written
    5. At A Glance :
      • Shows info like how many posts we have, how many pages we have.
      • Displays wordpress version and current active theme
    6. WordPress Events and News :
      • We can see info about wordpress events scheduled near our location.
      • We can also click on meetups link to see wordpress meetups.


    Today I learned details about the admin dashboard in wordpress, and tools in the wordpress.

  • Day 5, Reflecting on mistakes


    • Security Vulnerability
    • Plain file database
    • foreach loop and mail()

    Security Vulnerability

    As discussed in earlier blog, I have used cookie for verification of email address, but doing so I overlooked major flaw in this which will store the email address as verified without having the correct code.

    Let me walk you through how this can be achieved:

    1. Generate a SHA256 hash of anything random from https://emn178.github.io/online-tools/sha256.html and copy it

    2. Enter email on the subscribe form, then open dev tools, go to cookie storage:

    3. You can see the `codeHash` cookie here, edit the value of the cookie and paste the copied hash there.

    4. Input the random text or code you used to create the hash into the form

    5. After clicking submit, we are able to register the user without having access to their email at all, from just front-end.

    Instead of jumping to using cookies I should have researched more and used sessions, which are stored on the server side and can not be edited by user for this.


    Using PlainText File as Database

    It took me longer than expected to setup the environment which made less time available for actual development.

    We had to get email address from users and store them, in hurry I just used file operations in php to store the address.

    To check if an email exists or not or to delete an email it had to read the whole file again, search through each email address and find it and then remove it if delete operation was requested.

    Unfortunately plain text files don’t have indexes and stuff to make this operations easy to do, fortunately I had abstracted the functionlity to get,add and delete mails using OOP and had very little refactoring to do to use mysql DB

    <?php
    require "Database.php";
    
    class SubscribersDatabase
    {
    
        // db connection 
        private $conn;
    
        public function __construct()
        {
            $dbCon = new DatabaseConnection();
    
            $this->conn =  $dbCon->getConnection();
            if(!$dbCon) {
                echo "db error";
            }
        }
    
        public function getAllEmails()
        {
           //logic to get all emails
    
        }
    
        public function emailExists($email)
        {
            //logic to check if email already exists
    
        }
    
        public  function addEmail($email,$verified)
        {
             //logic to add new email to db
        }
    
        public function removeEmail($email)
        {
         
            //logic to delete email
    
        }
    }
    
    ?>
    

    What i learned from this : think very thoroughly when using plain files to store data, it may seem tedious to setup and use database but always better choice than plain files.


    foreach loop and mail()

    • The getEmails() function return an array with all the email addresses to which we have to send updates.
    • I used foreach loop to go through each email, and send updates using mail() function in php.
    foreach($emails as $email){
        // ...remainder code
       mail($email, $subject, $message);
    }
    

    After going through the documentation of mail(),

    It is worth noting that the mail() function is not suitable for larger volumes of email in a loop. This function opens and closes an SMTP socket for each email, which is not very efficient.

    https://www.php.net/manual/en/function.mail.php

    Summary : Today I learned site security, error handling, why pleasant ui is must for a site and also self evaluated myself on how I code and what to improve on moving forward

  • Day 4, working on mvp

    Contents

    • DbLess Email Verification
    • Crontab setup
    • Stub for sendmail functionality

    DbLess Email Verification

    So, how to verify and store email without actually using any database, you need a way to securely store the sent verification code and also verify the user input code.

    We have to store the code on the client side in the cookie securely, but cookies are not secure and can not be used to store sensitive info. My solution for this is to

    • Hash the code, and store only the hash in the cookie
    • Get code from user in a form, hash it using the same algorithm and only compare the hashes for match.

    This approach will make it secure to store verification code on the client machine

    Note : This is not the best solution possible, We can also send user an link to the verification. (will be testing this method also)

    function storeCodeHash($code){
         $codeHash = hash('sha256' , $code);
         setcookie('codeHash', 
                    $codeHash , 
                    time()+60*2);
        }
    

    I have set the cookie to expire after 2 minutes.


    Crontab setup

    crontab is a command line utility in unix systems allowing users to schedule jobs to be run at specific time.

    How to add a cron job in your local system?

    To add a cron job, we can to use crontab

    1. crontab -e : this will open a file in the vim editor to add your new cron job
    2. The format for adding fron job is as shown below
    *    *    *    *    *   /home/user/bin/somecommand.sh
    |    |    |    |    |            |
    |    |    |    |    |    Command or Script to execute
    |    |    |    |    |
    |    |    |    | Day of week(0-6 | Sun-Sat)
    |    |    |    |
    |    |    |  Month(1-12)
    |    |    |
    |    |  Day of Month(1-31)
    |    |
    |   Hour(0-23)
    |
    Min(0-59)
    
    copied from [cronitor.io]
    
    1. If we want to schedule a job to be run every 5 minutes we can use following expression */5 * * * * run.php

    ‘*/n’ is used to add step value so it can run every n interval. I used crontab.guru to learn more about the time expression and how to use it.

    1. press i to go into insert mode in vim.
    2. type your cronjob */5 * * * * run.php
    3. press escape to get out of vim
    4. type :wq to write and quit vim
    5. It will give output as crontab: installing new crontab in the terminal.

    Ok, we now know how to schedule a cron job but how to make it so that the send updates functionality on our server is being called properly?

    • I tried first run the script using php script.php from the terminal, it was running without error but the mailghog was not capturing the mail.
    • As we are running this php script standalone and not on the server, that’s probably why the mailhog couldn’t capture the sent mails.

    the curl utility : it is used to send http requests to webservers from command line, that’s exactly what I wanted.

    • I updated the cron job with curl and got it to capture mails in mailhog.

    Stub for SendMail functionality

    As we want the sent mail to look better, I am sending html mail, we can format the mail how we want to and also make it easy for the user to understand it better

    Sending HTML mail from php

    • I am using inbuild mail() function to send mail to the user
    • We have to set appropriate headers in order to be able to send a HTML email
     $headers[] = 'MIME-Version: 1.0';
     $headers[] = 'Content-type: text/html';
    
      mail($email , $subject , 
           $message , implode("\r\n" , $headers))
    

    implode is used to combine the array elements in a string using a some expression


    XML Parsing is yet to be done which is a critical thing for this project

  • Day 3 at rtcamp

    Today I spent most of the day setting up the development environment and troubleshooting.

    Familiarizing with CLI

    I did most of the work like installing libraries, required modules and stuff on CLI today. It took me a little bit of more time than expected to get handy with the terminal. I learned about how to create and delete directories from terminal itself.

    Commands I learned

    1. ssh-keygen : I used this command to generate SSH keys for github authentication
    2. ssh-add : to add the created keys to the SSH agent of my local machine I used this command
    3. open -a textedit : I found this command so I can open the public key in text editor and copy it to github
    4. rm -rf : Used this command to delete the app directory
    5. git clone : used this to clone the repo for assignment
    6. mkdir : create public directory in app using this

    Fixing site creation error in local WP on MacOs

    Yesterday when I installed the local WP, i tried to create new site multiple times but it was giving error, I couldn’t solve it myself so I asked for help on the gh discussions and got the solution.

    the local wp has some issues with compatibility with the mac silicon m2 chips so I had to install “Rosetta”

    Rosetta is a dynamic binary translator developed by Apple Inc. for macOS, an application compatibility layer between different instruction set architectures. It enables a transition to newer hardware, by automatically translating software

    wikipedia.org

    Preparation for the quiz

    I revised procedural php concepts and HTML, as I am not very good at CSS today I gave extra time to learn CSS from the scratch. I glanced thorugh my MySQL cheatsheet for quick overview.

    Assignment inception

    We are given an assignment as a part of our engineering basics course to create a plain php application that takes user email and sends them github timeline updates every 5 minutes.

    I don’t have much experience with the php so today I will design the application, learn all the prerequisites to create such application and start working on the solution ASAP.


    Today was nice, I am slowly getting how to use the mac and get comfortable with it.

  • Day 2 at rtcamp

    Today we learned about how the whole training is going to be conducted by the L&D department. We were assigned to pods and pod leaders. An outline of all the courses scheduled in the 12 weeks time was also shared by the team.

    We are now enrolled in few courses on the rtcamp LMS, that we have to complete in the given time, also we were added to the rtcamp github team and the repo to upload our assignments.

    We had a brief meeting about systems overview in which some tools like ssh, rsync and commands were explained. Also we learned little bit about easy engine, CI/CD and workflow.

    we kick started our learning today and tomorrow we have quiz on the programming languages!

  • First day at rtcamp

    Today I had my first day at rtCamp, I was really excited to join as this is my first job. I am working remote from day 1, that is also awesome.

    First day started with an on-boarding meeting in which we setup our new devices with new accounts and software. after that we had to complete some tasks to complete the joining process. We also had meeting with L & D department regarding training and schedule.

    Highlights

    No Sir/Mam

    In rtcamp we are encouraged to call everyone by their names, no matter the seniority(Even the CEO). It is not only discouraged but also frowned upon to call someone sir or mam.

    Round Table

    RT in rtcamp stands for round table, you can ask questions, share feedback, suggestions and all are treated equally no matter what your position is.


    I had informal meeting with my rtBuddy. rtBuddy is someone who helps new joiners in the process and answers their questions. Finished my day with having everyone in the team introduce themselves, I also got to introduce myself. First day at rtcamp was good, and I am excited for tommorow!