Steps to create your first React Project
- Start with design of UI
- Break the design into components
- Design state for the components
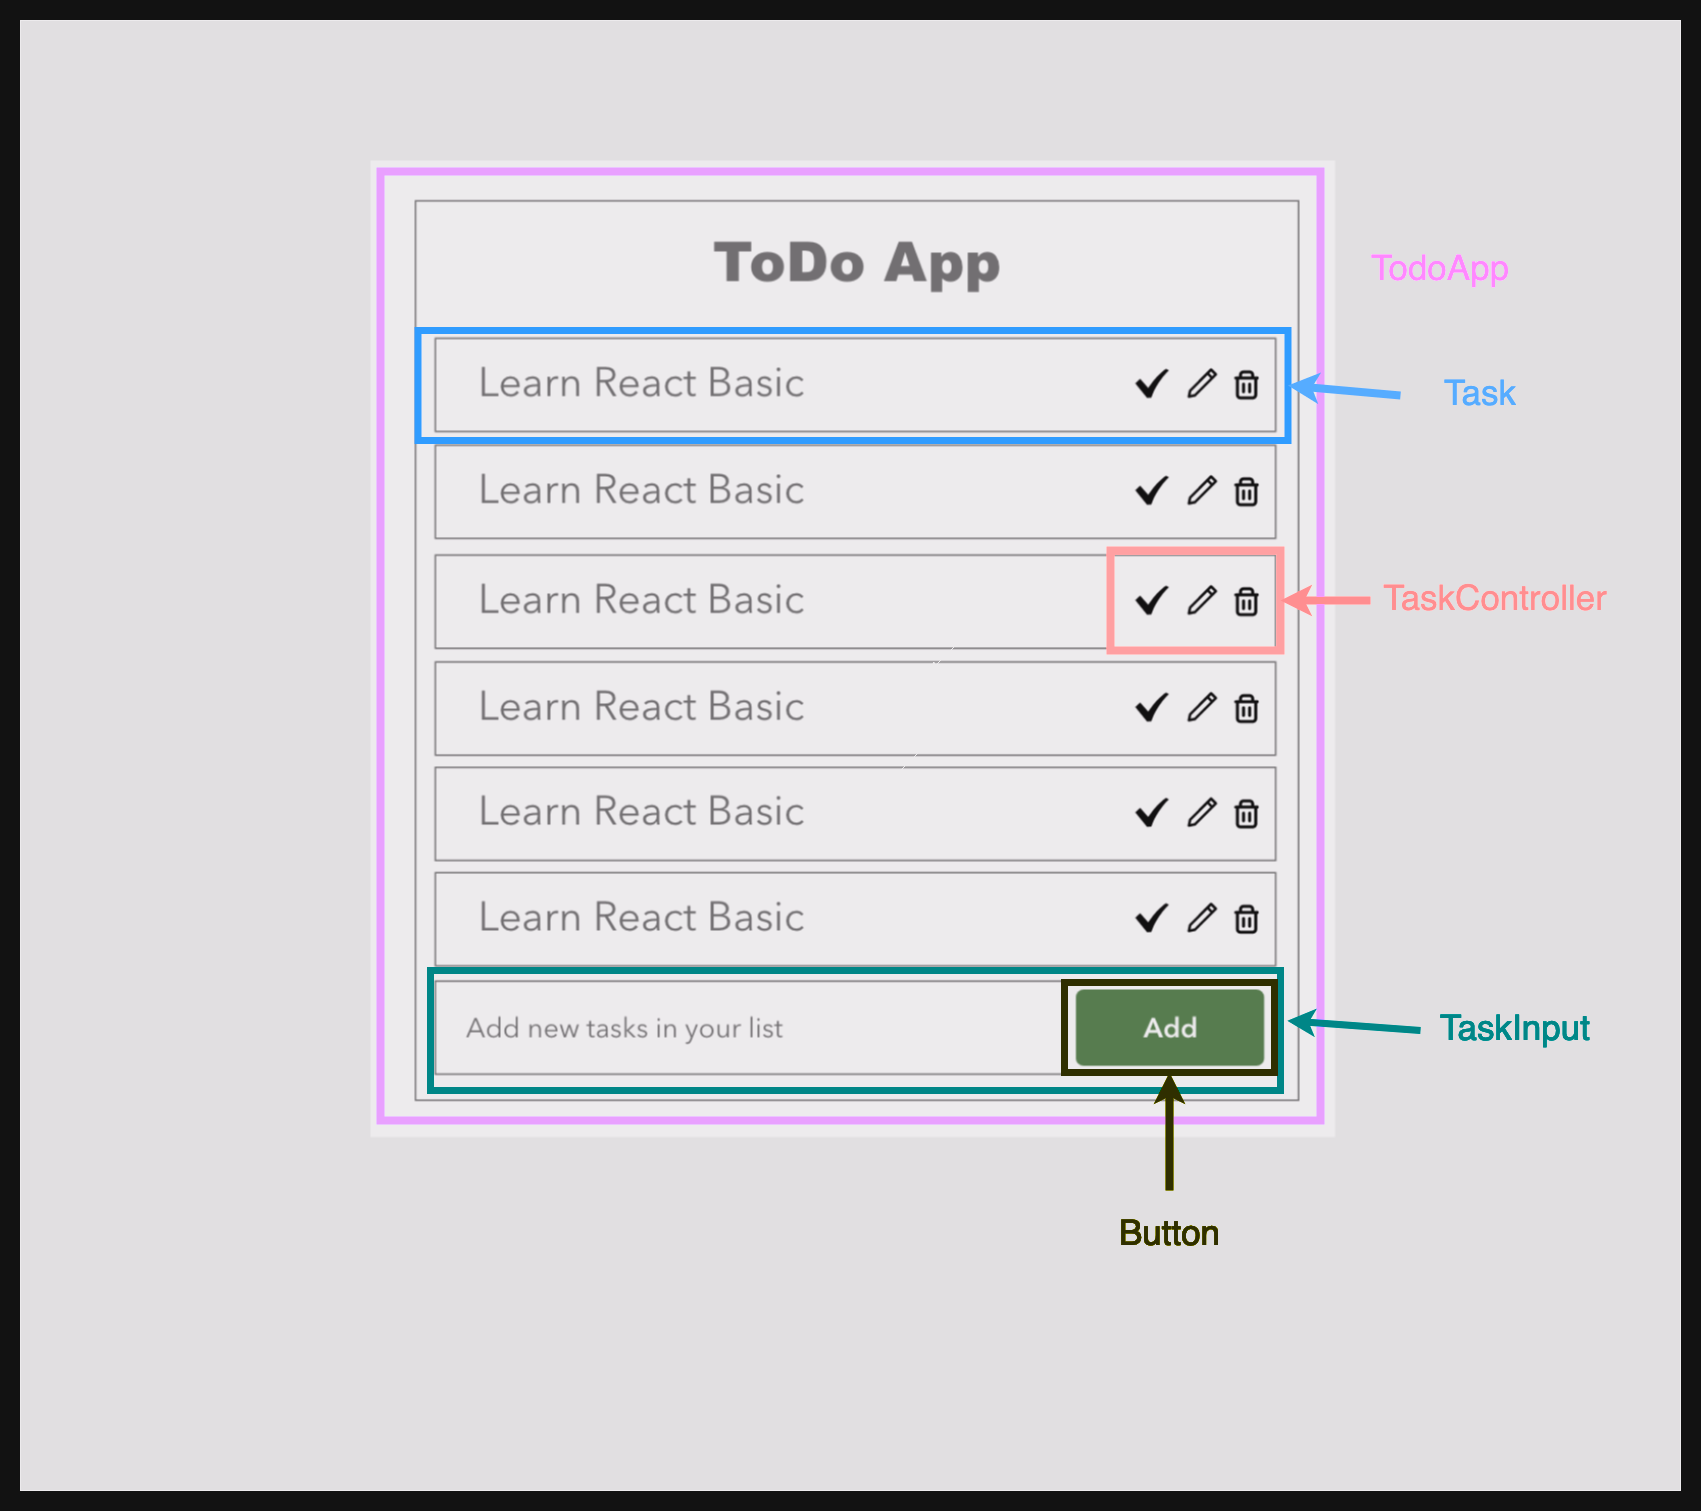
As for our assignment, we already have the design of what we want to make, here it is

Next is to find out the components from the design
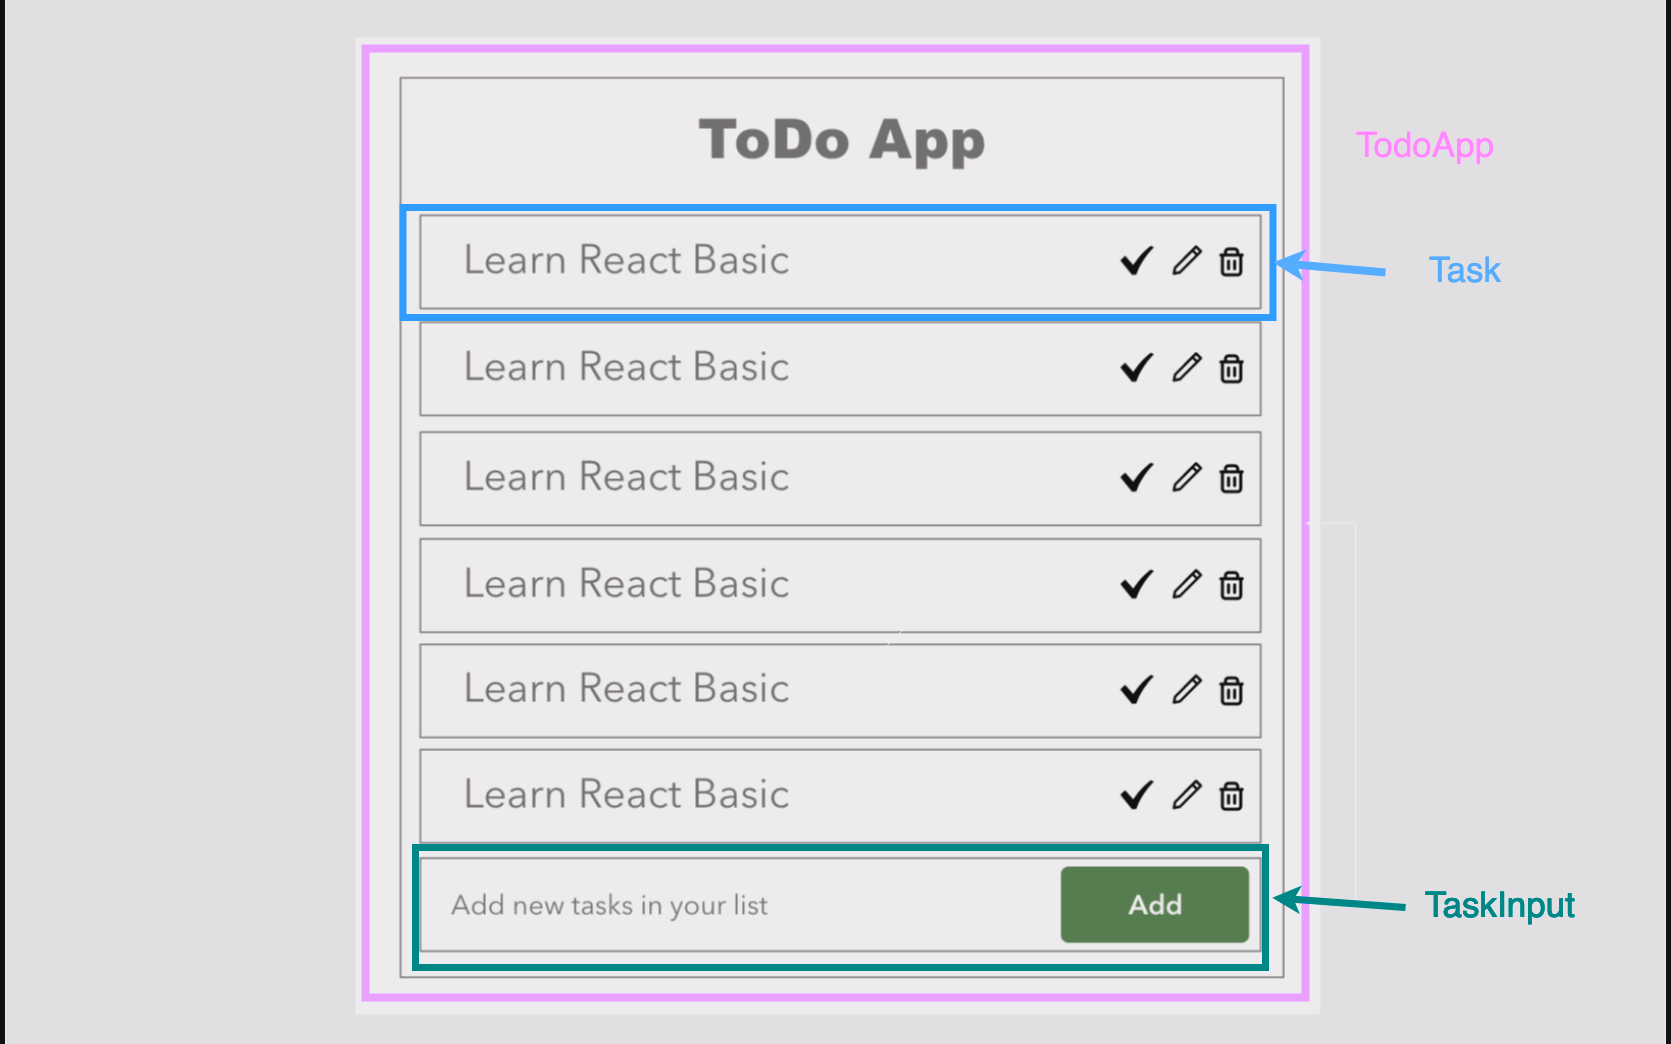
We can even break down the components more!!
We will start working on the actual coding and state design tommorow!
React Life Cycle

The react component goes through 3 phases,
- Mounting
- Updating
- Unmounting
In mounting, the component is being added for the first time, the componentDidMount hook can be used here.
The render is the most common method, it is compulsory to have in our component, it will render the component.
componentDidMount is called as soon as the component is mounted and ready, we can use the useState here to update the component
componentDidUpdate : This method is invoked when the componet updates,
componentWillUnmount : This method is called just before the component will be unmounted, we can make use of it to cleanup or cancel any api calls.
The catch here is that all these methods are only available in class components, what about functional components?
we can use lifecycle methods in functional components with the help of the useEffect() hook.
useEffect( () => {

}, [])
the useEffect has two arguments, a callback function and dependency array
By using this we can create functionality similar to the class component lifecycle methods componentDidMount, componentDidUpdate and componentDidUnmount
If we pass empty dependency array, it will only be called when component is mounted
useEffect(() => {
			console.log("componentDidMount");

		}, []);
This will only be called once.
If we want to useEffect for component update, in dependency array we can give the state variable on which change we want to run the hook.
useEffect(() => {
			console.log("componentDidUpdate");

		}, [ctr]);
Event Handling
Event handling in react is similar to that of html but the names of the event are camelcase
So, onclick event becomes onClick in react
<button onClick={handleIncrement}>Increment</button>I had created this input field and explicitly put the value of it, after doing that it stopped being editable, why? , if we set the value of the input we must also provide an onChange event handler which will update the input’s value.
import React, { useState } from "react";

function Task(props) {
  const [task, setTask] = useState(props.value);
  const inputOnChange = (e) => {
    setTask(e.target.value);
  };
  return (
    <>
      <input
        type="text"
        disabled={props.disabled}
        className="list-group-item"
        onChange={inputOnChange}
        value={task}
      ></input>
      <p></p>
    </>
  );
}

export default Task;
Conditional Rendering
We can use conditional to render the components or part of component conditionaly.
For example, if input field has some error then only we will show the error message else it will be hidden, this can be achieved by code below
function Task(props) {
  const [task, setTask] = useState({value: props.value});
	const inputOnChange = (e) => {
		let newTask = { ...task };
		newTask.value = e.target.value;
		if (newTask.value.length < 5) {
			newTask.error = true;
		}
    setTask(newTask);
  };
  return (
	  <>

      <input
        type="text"
        disabled={props.disabled}
        className="list-group-item"
        onChange={inputOnChange}
        value={task.value}
		  ></input>
		{task.error &&  <p>Enter text more than 5 characters</p>  }
    </>
  );
}
Here is how the output will look:-
[googleapps domain=”drive” dir=”file/d/1lNlNL7lzr4hPbsf9R5SBV2bJjLqAq_rG/preview” query=”” width=”640″ height=”480″ /]List of references refered today:
- https://programmingwithmosh.com/javascript/react-lifecycle-methods/
- https://react.dev/reference/react/useState
- https://overreacted.io/a-complete-guide-to-useeffect/
- https://babeljs.io/repl
- https://react.dev/reference/react/StrictMode#fixing-bugs-found-by-double-rendering-in-development
- https://projects.wojtekmaj.pl/react-lifecycle-methods-diagram/